Clerk is a battery included authentication library built for NextJS that simplifies the authentication process immensely for your app. Clerk take cares of everything you need. Allows you to update users from your auth service, change auth methods on the fly, and change roles and permissions in your organization. You can even change the theme, colors, and icons in the pre-built Sign-in and Sign-out components. And, there is bonus content for tRPC users.
Clerk supports:
- Social
- MFA
- Email, Phone and Password
logins with a click of a button. To do that, before setting up our NextJS app we first need to setup a Clerk Account and configure the auth options.
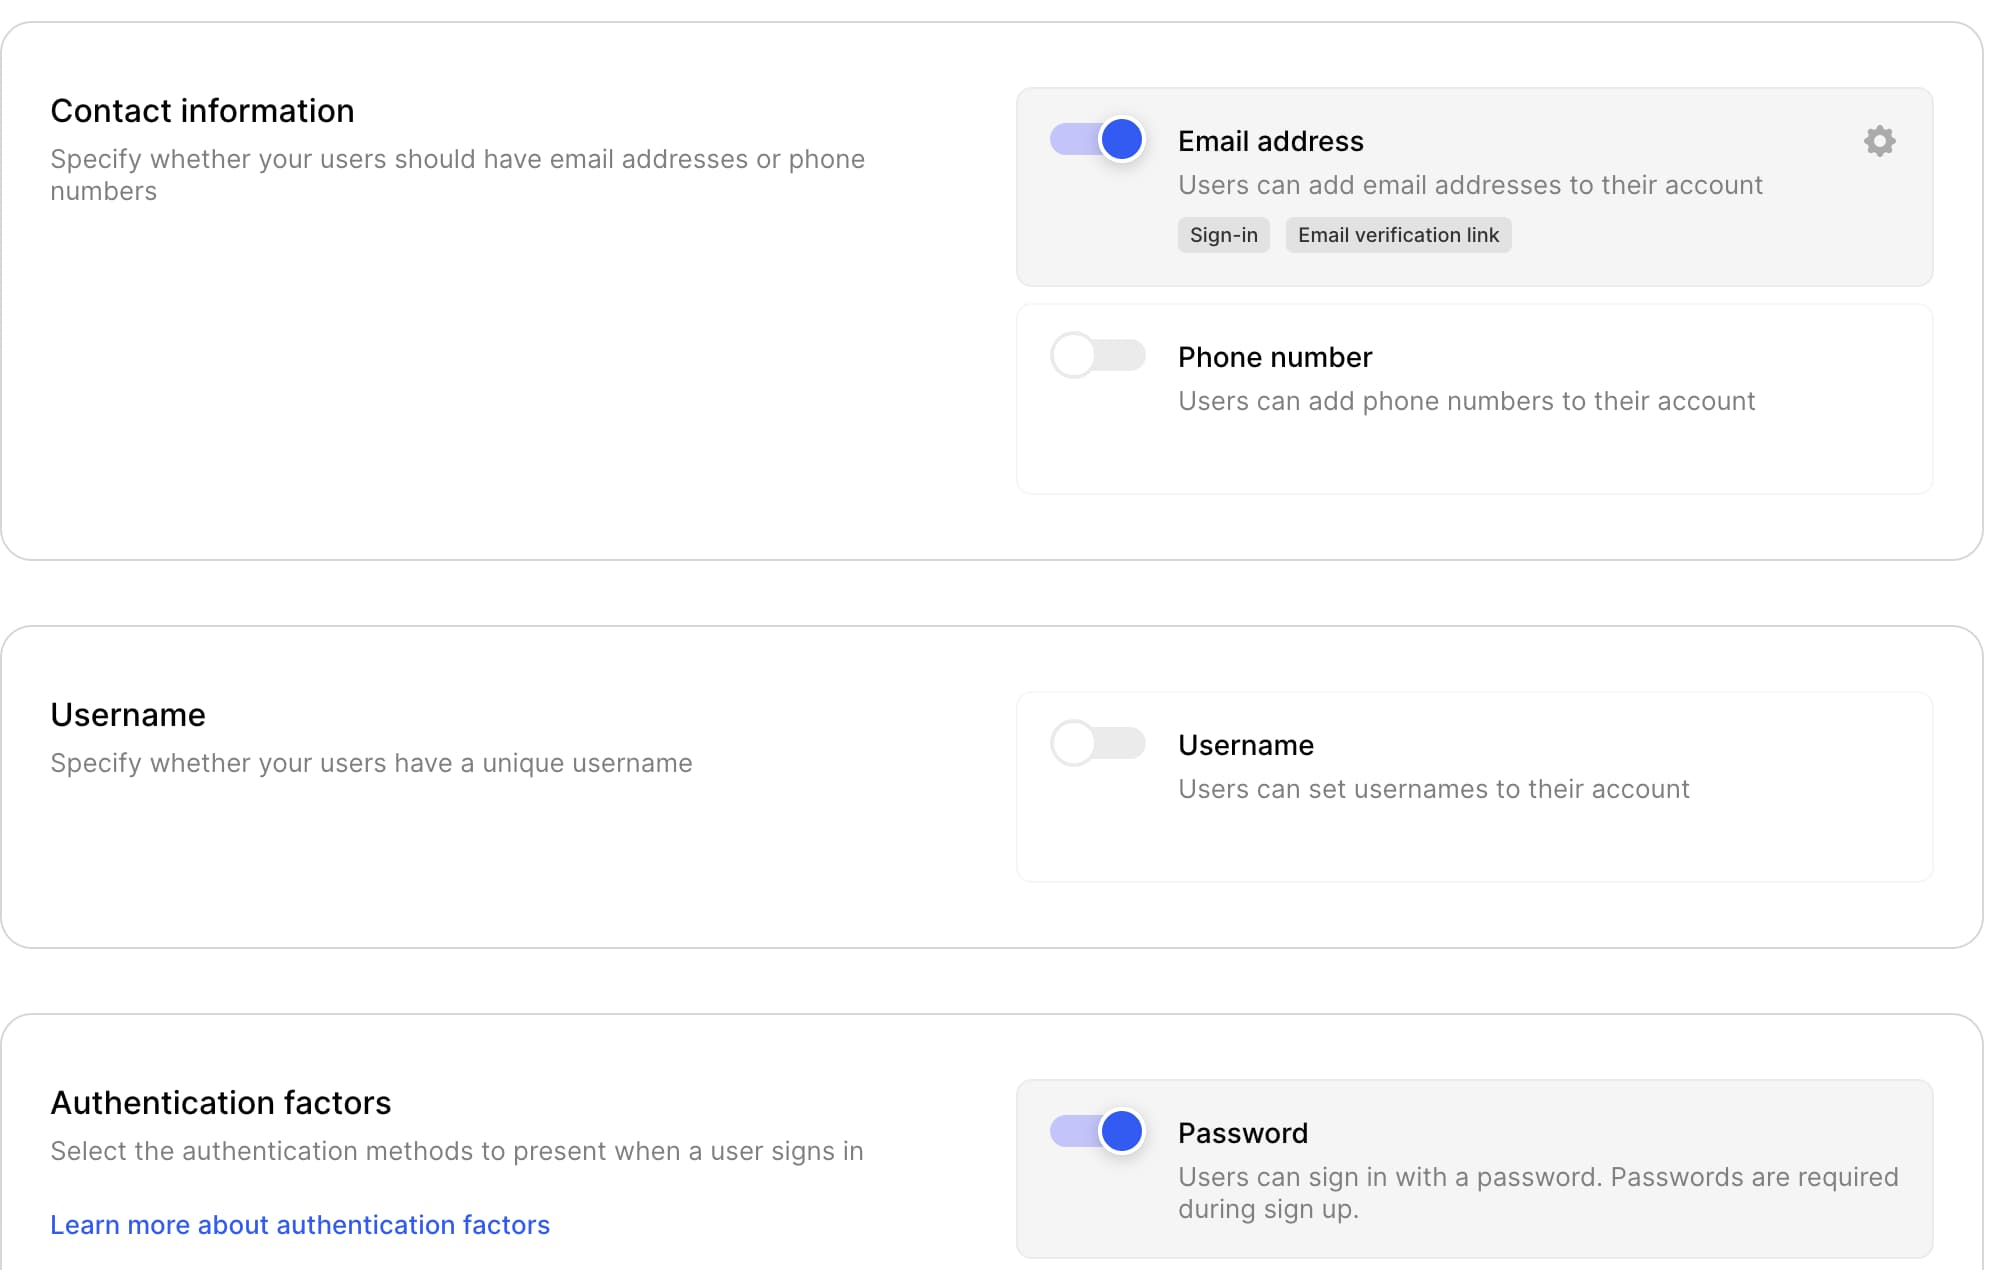
Since, are only going to deal with email and password we just enabled those two. There are couple of things to do here, but we will go back to here after we bootstrapped our NextJS app.
npx create-next-app@latest --tsAfter we successfully installed our NextJS, we need to create a .env file in the root of our project - same directory as package.json.
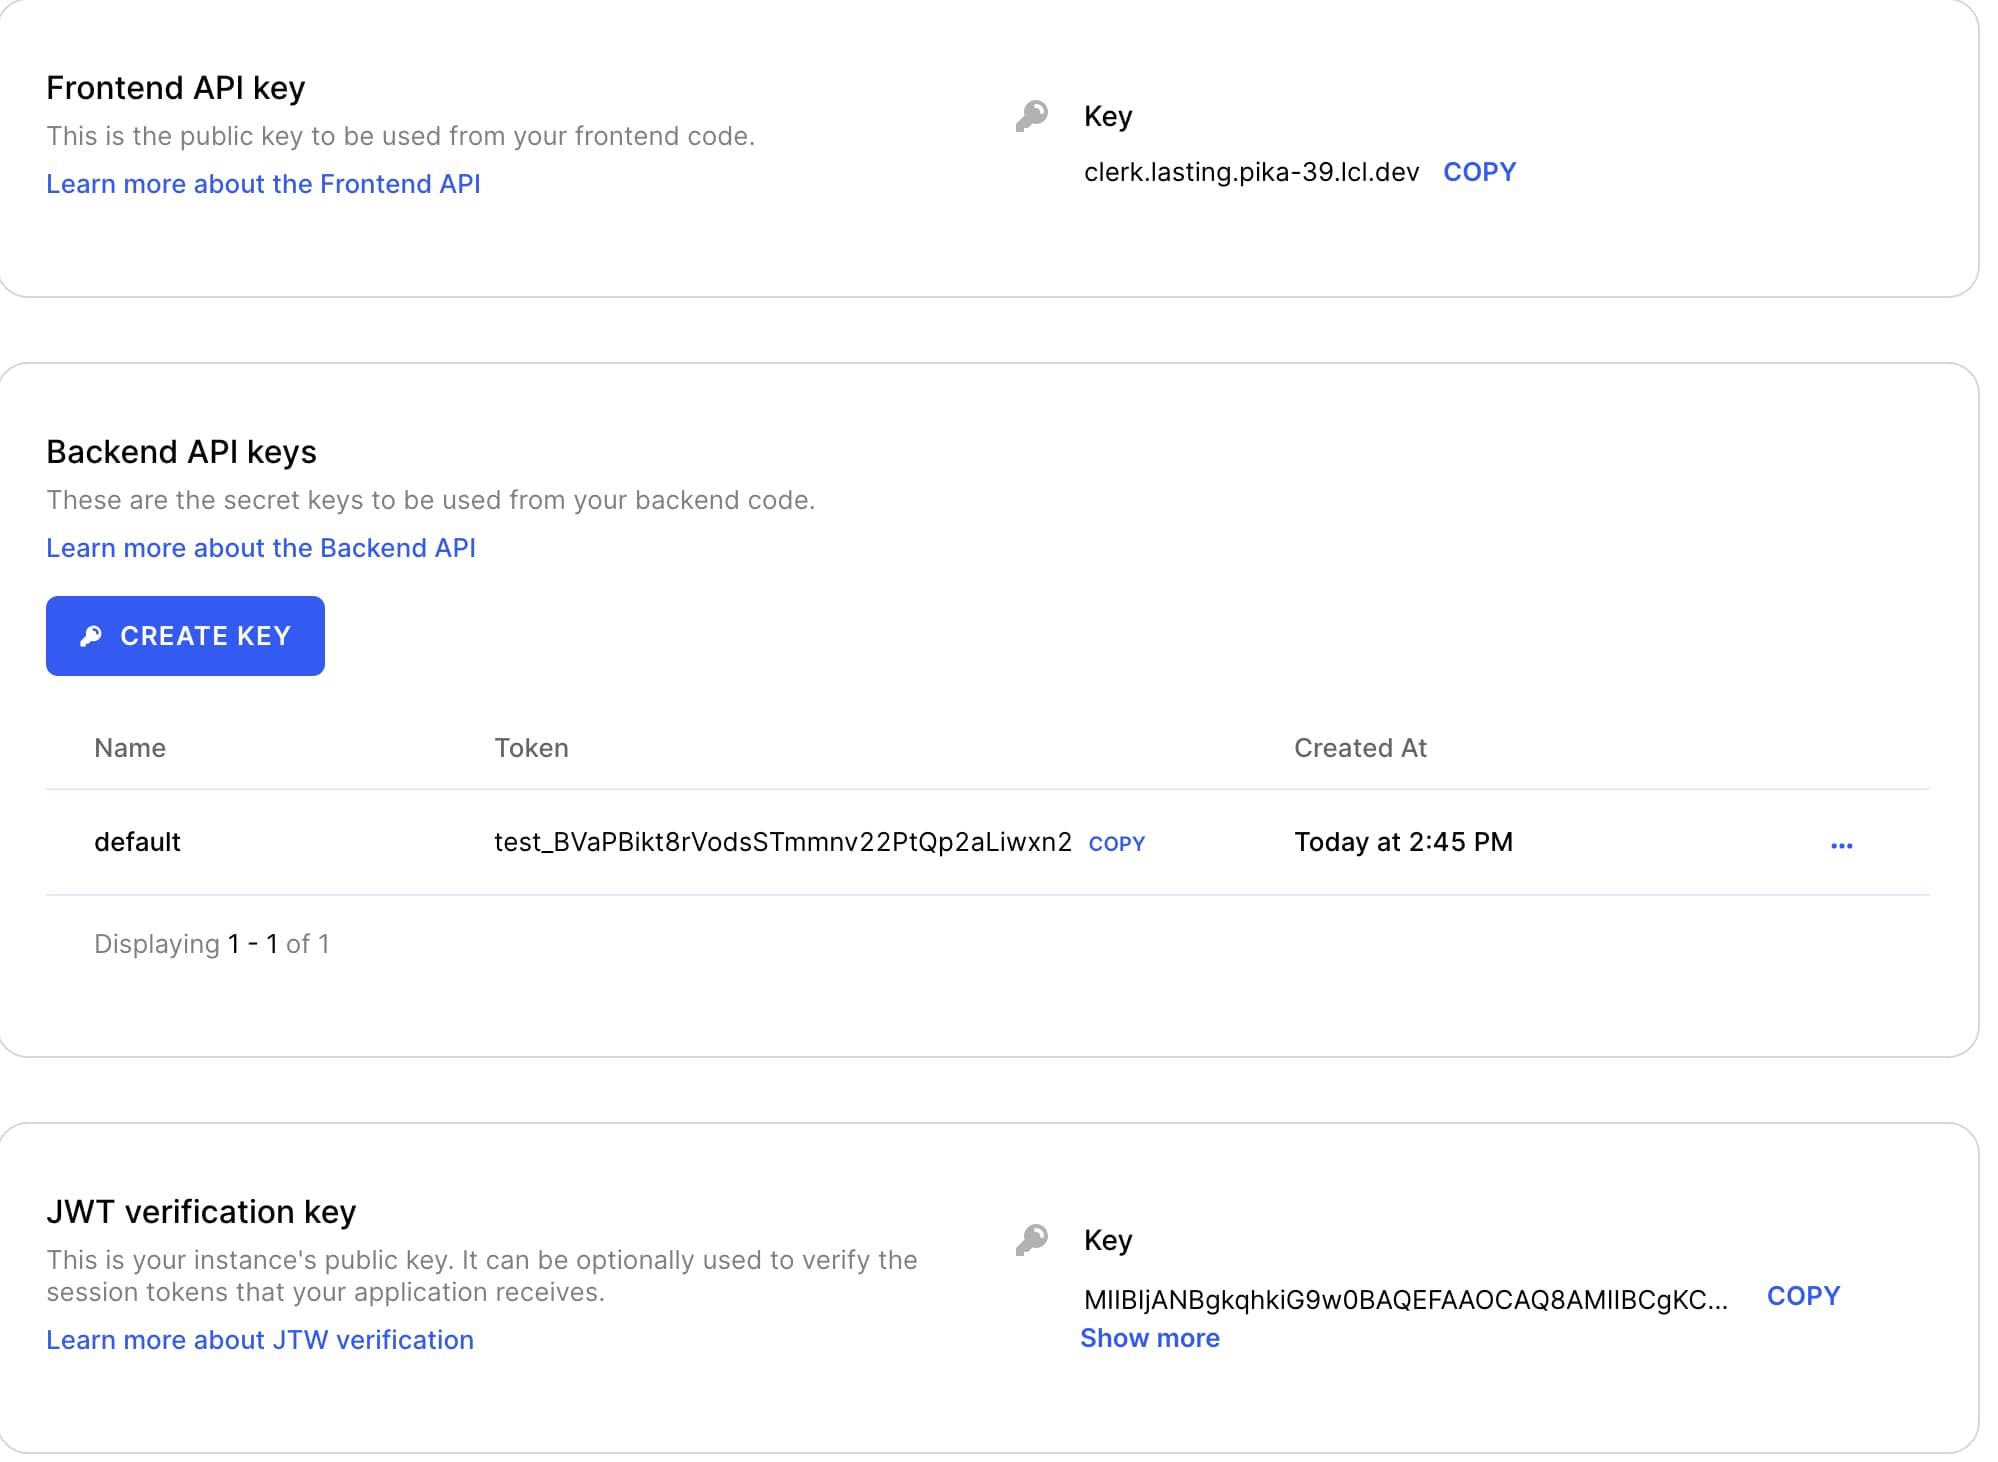
Add your own keys to your own .env file as following:
NEXT_PUBLIC_CLERK_FRONTEND_API="clerk.lasting.pika-39.lcl.dev" // Replace with your own keys
CLERK_API_KEY="test_BVaPBikt8rVodsSTmmnv22PtQp2aLiwxn2"
CLERK_JWT_KEY="MIIBIjANBgkqhkiG9w0BAQEFAAOCAQ8AMIIBCgKCAQEA4"
Now, all we have to do is to introduce ClerkProvider in our _app.tsx.
First install,
npm install @clerk/nextjsThen,
const publicPages = ["/public"];

function MyApp({ Component, pageProps }: AppProps) {
  const { pathname } = useRouter();

  const isPublicPage = publicPages.includes(pathname);

  return (
    <ClerkProvider>
      {isPublicPage ? (
        <Component {...pageProps} />
      ) : (
        <>
          <SignedIn>
            <Component {...pageProps} />
          </SignedIn>
          <SignedOut>
            <RedirectToSignIn />
          </SignedOut>
        </>
      )}
    </ClerkProvider>
  );
And, to test these we need add two more pages under pages directory as following:
- Private Page as private.tsx
const PrivatePage = () => {
  return <div>Private</div>;
};- Public Page as public.tsx
const PublicPage = () => {
  return <div>PUBLIC PAGE</div>;
};
If we try to navigate to Home, it will because we just added /public as allowed public page. But if we try Private it will
redirect we to Login page.
And if’d like to add Logout option, it’s also quite easy just use useAuth hook. Add the following to your index.tsx.
const Home: NextPage = () => {
  const { signOut } = useAuth();

  return (
    <div className={styles.container}>
      <button onClick={() => signOut()}>Log-out</button>
    </div>
  );
};
And, if’d also like to access logged in user data. Just update your index.tsx with following.
const Home: NextPage = () => {
  const { user } = useUser();
  const { signOut } = useAuth();

  return (
    <div className={styles.container}>
      <p>{user?.emailAddresses[0].emailAddress}</p>
      <button onClick={() => signOut()}>Log-out</button>
    </div>
  );
};
Bonus
If you are planning to use ClerkJS with tRPC it may require some additional configuration. To access user data inside tRPC context we need to add the followings.
In your api/trpc/[trpc].ts
export default withAuth(
  trpcNext.createNextApiHandler({
    router: appRouter,
    createContext,
    batching: {
      enabled: true,
    },
  })
);
Then, you need make necessary changes where you create your context function.
export type optsWithAuth = Omit<trpcNext.CreateNextContextOptions, "req"> & {
  req: NextApiRequest & { auth?: { userId: string } };
};

export async function createContext(opts?: optsWithAuth) {
  return {
    req: opts?.req,
    res: opts?.res,
  };
}
export type Context = trpc.inferAsyncReturnType<typeof createContext>;
This will ensures the auth will be inside your requests each time you make any rpc call. E.g:
.query("get-all", {
    async resolve({ ctx }) {
      const userId = ctx.req?.auth?.userId;
      if (!userId) return;

      return await prisma.todo.findMany({
        where: {
          ownerId: userId,
        },
      });
    },
  })
There are still lots of features to cover on ClerkJS, and I hope, I encouraged you to check ClerkJS out.